
I chickened out of trying to make my own kombucha for a long time.
It all started when I sat in on a kombucha making class at a Mother Earth News Fair event. Up until that point I only knew about the end product that I was buying form my local health food store. I had no idea where it actually cam from, and when I saw a SCOBY for my first time I was a little intimated to say the least. Honestly that thing scared me. I needed time to wrap my head around it.
But eventually I came back around to the idea when a friend was brewing some at her home. She gave me a SCOBY, some starter liquid and some tips to get me going.
I have been making kombucha at home for some time now and can’t imagine ever buying it again if i don’t have to. Making kombucha at home not only saves you so much on costs but is also so satisfying.
It is actually quite simple. BUT there are many factors that go into making kombucha and I couldn’t possible list them all here. I highly recommend The Big Book of Kombucha for troubleshooting, recipes and all kinds of facts pertaining to Kombucha! I reference this book all the time.
What is Kombucha?
Kombucha is a naturally carbonated, fermented sweet tea. But don’t worry if you are wanting to cut back on sugar and caffeine! A majority of the sugar and caffeine is diminished in the fermentation process. The starter for kombucha is a SCOBY (symbiotic culture of bacteria and yeast). Like other fermented foods it contains good bacteria which has a bunch of benefits for our gut, immune system, detox and more.
(Diclaimer: I am not a Dr. and am not here to treat or cure anything, be sure to do your own research and ask your Dr if you have concerns about if Kombucha is right for you 😉)
“Fermented foods are rich in sources of probiotics- that is, those beneficial bactieria”
“When done right, fermentation of food helps with nutrient absorption, vitamin synthesis, breaking down proteins, alkalizing pH, restoring homeostasis, boosting immunity, and producing immunoglobulins.”
The Big Book of Kombucha
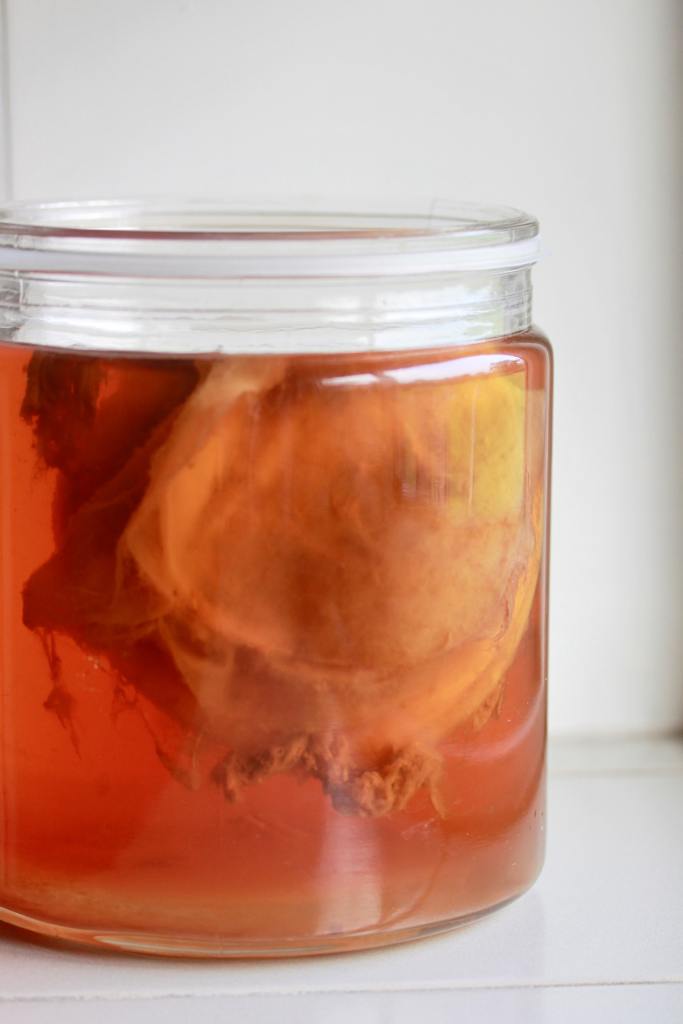
What is a SCOBY and How to Get One?
SCOBY stands for symbiotic culture of bacteria and yeast. The bacteria and yeast change the sweet tea into a fizzy, probiotic rich beverage. It appears like a rubbery disc also know as the “mother”. A new SCOBY grows with each new batch. These can be given away, saved in another glass vessel with sweet tea or added to the next batch if your SCOBY is still on the smaller side.
The easiest way to get a SCOBY and some starter liquid is from a friend or local home brewer! They often have plenty of extra to spare. But, the quality could be low if they are not well informed on proper brewing methods. Another option is to order a SCOBY online from a reputable supplier like Kombucha Kamp. Avoid any SCOBY that has been refrigerated, dehydrated, test tube size or grown from a commercial bottle.
Equipment & Supplies
Keep in mind you do not want to use metal on SCOBY or kombucha brew. Its ok for the sweet tea before it’s added to the batch though.
1 Gallon Batch Brew
- 1 gallon or 1.5 gallon wide mouth glass jar like this or this
- Cloth cover & rubber band
- Long-handled spoon
- Pot or Kettle
- Funnel
- Meat thermometer
- Measuring cups
- Glass Brewing Bottles designed to withstand the pressure of carbonation
- Strainer/filter *optional
- pH strips *optional
Ingredients:
- 1 gallon chlorine-free water (we use a Berkey for purifying our water)
- 4-6 organic black tea bags (or half black & half green tea) or 1-2 tablespoons loose-leaf tea
- 1 cup sugar (it needs to be cane sugar for kombucha brewing. I like to use organic sugar)
- 1 full-size kombucha SCOBY (4-5 oz) with 1-2 cups mature kombucha for starter liquid
Instructions:
- Heat 2 quarts of the water with tea bags to just below boiling. Let steep for 15 minutes (I often forget and let it steep for longer). Remove from heat. (if you have chlorine in your water I have heard it recommended to simmer for 30 minutes, in that case you would simmer the entire 1 gallon of water with the tea bags).
- Remove the tea bags and stir in the sugar until completely dissolved.
- Pour in the remaining 2 quarts of cool water and stir. Check temperature. Too hot of tea can damage the SCOBY. If warmer than body temperature (about 100 F), cover with a clean cloth and set aside until cool enough and pour into you batch brewing container.
- With clean hands place SCOBY in brewing vessel with the sweet tea solution.
- Pour starter liquid on top of the SCOBY
- Cover vessel with a breathable cloth, like a clean dish towel or t-shirt piece (not cheese cloth) . Secure with a rubber band.
- Set it in a warm location, ideally 75-85 F, out of direct sunlight.
- Allow the tea to ferment for 7-21 days. After 5 days start tasting with a straw dipped beneath the SCOBY. Flavor will be somewhere between sweet-tart and too tart. Another sign of a success full batch is that a new SCOBY has formed.
- Once the brew reaches the flavor you prefer, it’s ready to harvest! Save at least 1 cup from the top of this batch for starter liquid for your next batch. (2 cups is even better if the brew is young) and pour it into a clean bowl. With clean hands move the SCOBY to the bowl with the starter liquid. Cover with a clean cloth and set aside.
- The rest of the kombucha is ready to drink straight or flavor and bottle it for second ferment!
- Use your SCOBY and starter liquid you set aside to brew the next batch! I like to start the sweet tea while I am bottling the finished batch and get a new batch going right away!
Bottling Your Kombucha!

When your kombucha has reached the flavor you want, the best way to keep it is to bottle it and store it in the fridge.
You can either bottle it as is or for more carbonation do a 2nd ferment at this point, with or without flavoring.
First, chose your bottles
Be sure to chose sturdy, glass bottles made for this purpose, as the carbonation increases you risk them exploding or cracking if they are not heavy-duty bottles designed to handle the pressure of carbonation.
Types of Bottles to Use
- Swing-top glass bottles with heavy thickness like these that are made to handle the pressure. Of course any bottle can break, but with these often the bottom cracks off or the cap leaks rather than the entire bottle exploding.
- Round bottles tend to break less than square ones.
- Re-use Store Bought Kombucha Bottles! Look for brands that use a thick, heavy glass. This is kind of my favorite. The twist on caps may lose a little of the carbonation but may also prevent explosions. And they are easier to clean. Be careful of ones with thin glass as it can break easier. And the caps can wear out over time but could be replaced with higher quality reusable ones.
- Antibacterial soap is not recommended for cleaning bottles and brewing vessels.
Plastic vessels or bottles are NOT recommenced because of the acid nature of Kombucha, chemicals may leach into the brew.
Plastic lids however are preferred. They do not have enough contact with the kombucha, so leaching isn’t a concern.
Never allow metal lids or any metal to come in contact with the brew.
Now you are ready to bottle!
- If you are adding flavor, add it to the clean bottles now (more info below on flavoring ideas).
- With a funnel carefully pour the fermented kombucha into the bottle. Fill bottles nearly to the top and cap them.
- Let bottles sit at room temperature for 1-5 days, or longer, to build carbonation and flavor. I like to keep mine in a box out of the way just in case of explosions ( I have not had any so far but they can be dangerous). You can also “burp” the bottles by slowly unscrewing the cap and quickly re-closing to let out just a little of the pressure if it looks like its building.
- Move them to the fridge when the kombucha attains the flavor and carbonation level you want. The cold temp in the fridge slows down, practically to a halt, the carbonation and fermentation process.
- Enjoy! You can drink them straight form the bottle or if you prefer a more clear beverage strain from the bottle to a glass.
Flavoring Ideas
I like to flavor my 2nd ferments with fresh fruits and herbs and fresh juice. Have fun with the flavors, experiment and find what you love.
A simple rule to start out is to add 2 tablespoons of organic fruit juice to each 16 oz bottle. If using store bought look for juice with little to no additives.
Here are a few combos I like to add to each 16 oz bottle:
Strawberry Ginger: 2 tablespoons chopped strawberries, 1/4 teaspoon fresh diced ginger
Triple berry blend: 1 tablespoon chopped black berries, 2 teaspoons chopped strawberries and 2 teaspoons lightly mashed raspebrries
Ginger Lemonade: 1/2 teaspoon fresh diced ginger, 1 tablespoon fresh lemon juice
Apple Pie: 1/4 cup diced apples + spices: 1/4 teaspoon cinnamon,1/8 teaspoon cloves,1/8 teaspoon ginger
Out of season I will often use frozen organic fruits. Just let them defrost first.
Have fun with this! I find each batch is a little different and I learn more every time! And definatley grab a copy of this book becuase you will have questions along the way!

Happy brewing!


Leave a comment